Decorating, DIY, Furniture
DIY Upholstering Wood Barbie Chair
Dec
DIY Upholstering Wood Barbie Chair
For the BarbieⓇ wood Townhouse dollhouse I donated to the Lone Star Cattleman Foundation, I also included wood furniture for each room. Here’s what the whole living room set looks like before finishing. The chair, sofa, lamp, and clock are made of solid pine. The two tables and coat rack are made from Baltic Birch.

I love Batik quilting fabric. If you take a peak in my sewing/quilting studio, you might think I’m a hoarder. I prefer “fabric connoisseur”. I don’t think I’ve ever seen a piece of fabric I didn’t like. Against my better judgement, I’ll share with you what part of my fabric stash looks like.

Steps for DIY Upholstering Wood Barbie Chair
Here’s the steps and progress of upholstering the chair. A few supplies you’ll need:
- About 1/8 yard of fabric
- Thick batting to make the chair look soft and a little fluffy
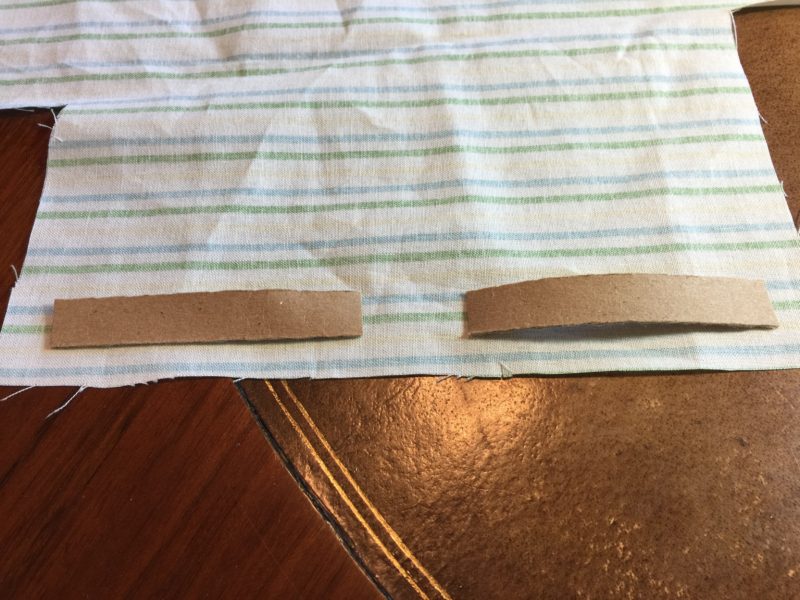
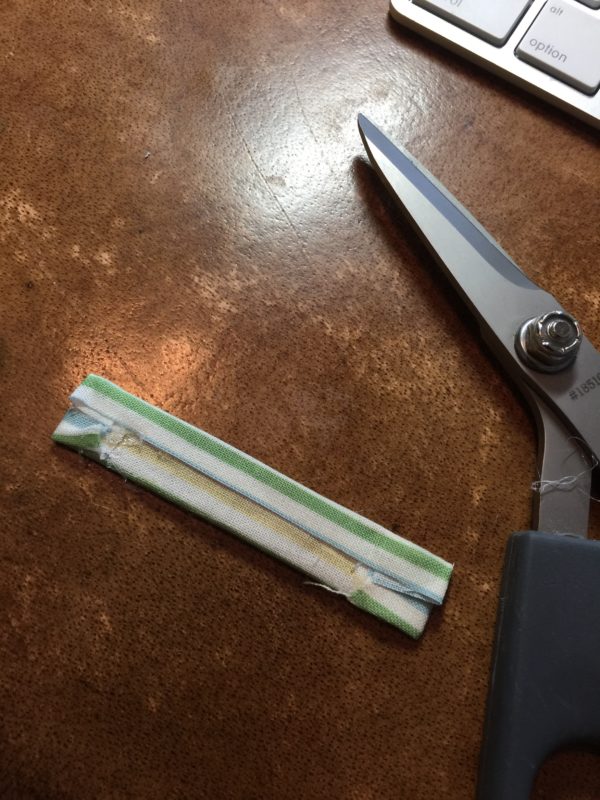
- Cardboard cut in strips 1/2″ wide. Because I do some upholstery for fun, I have a roll of Cardboard Tact strips I use. Cutting your own cardboard works just fine, though.
- Staple Gun. I use a Ryobi Cordless Stapler. It takes less force on my part to get the stables in the wood. I also have electric staple guns – they just take a little more pressure and force for the staple to go in all the way. Fortunately the pine wood is pretty soft.
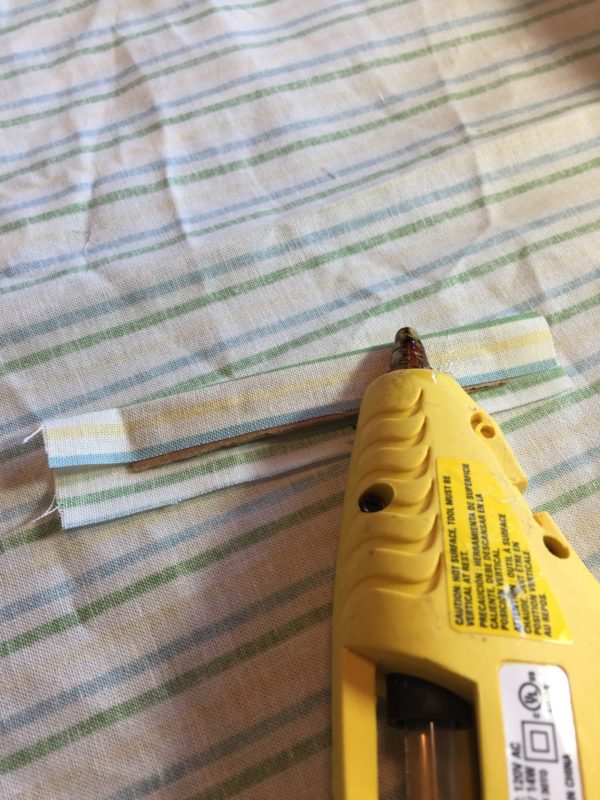
- Hot Glue Gun
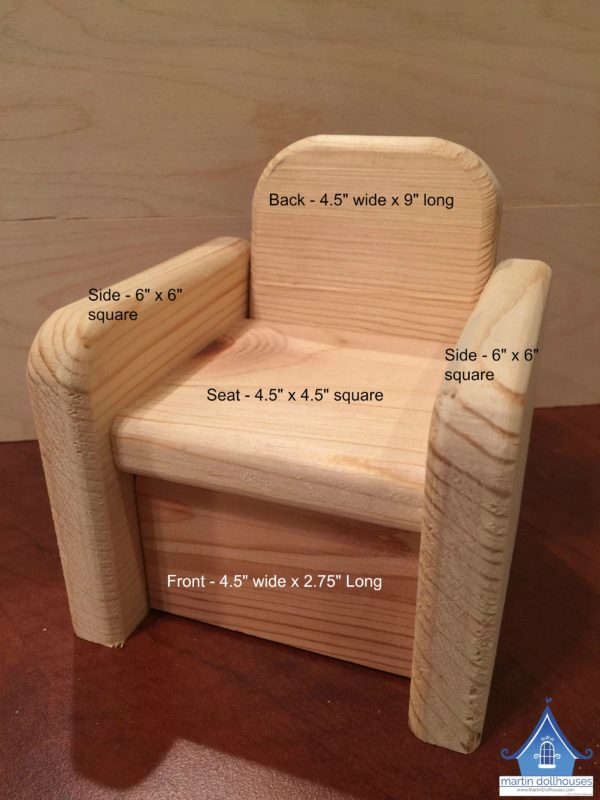
Step A: Cut the fabric into the following pieces for the Chair:
-
- 2 – 6 x 6″ squares for the two sides/arms of the chair
- 1 – 4.5″ wide x 9″ long piece for the back
- 1 – 4.5″ x 4.5″ square for the seat
- 1 – 4.5″ wide x 2.75″ long for the front area below the seat
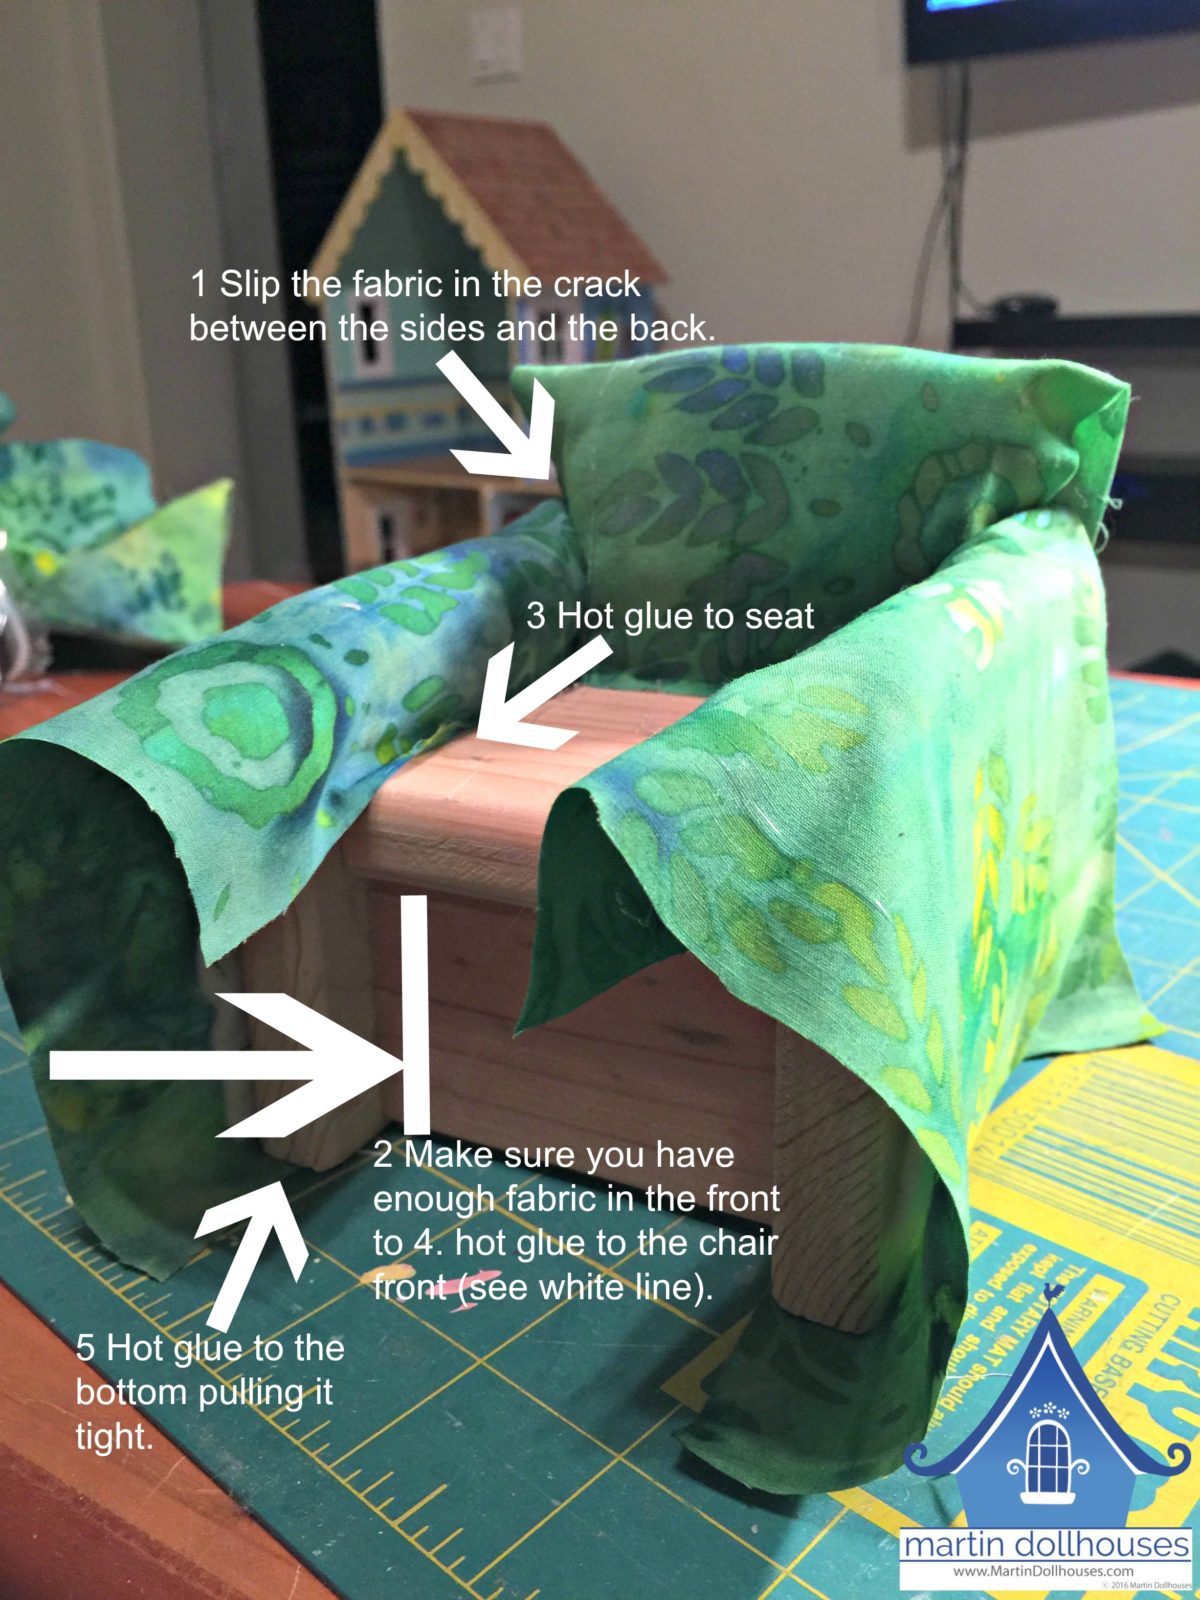
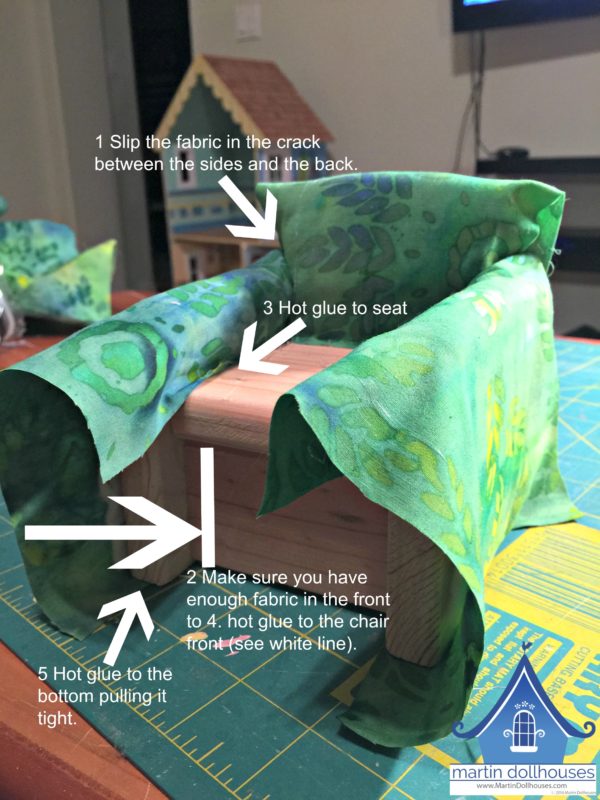
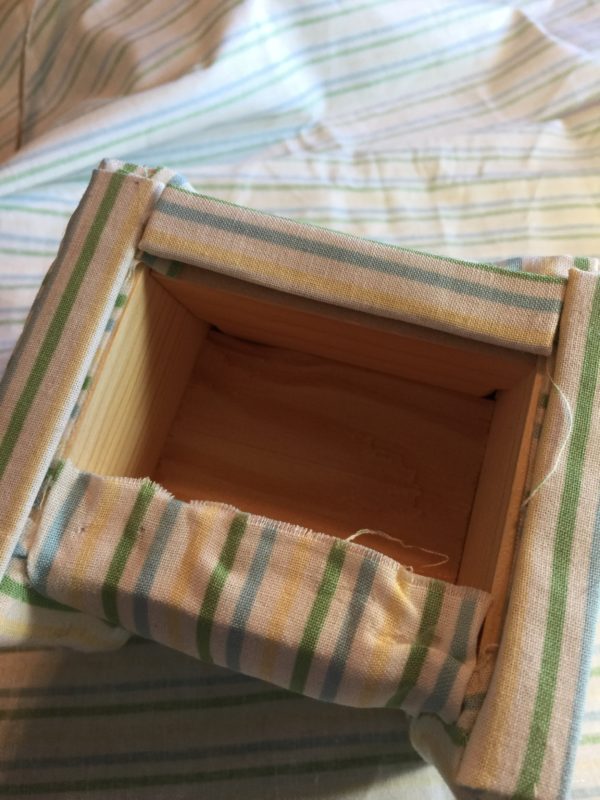
Step B: Adhere the fabric to the two sides/arms of the chair first. These are the two 6×6″ squares of fabric. Place a thin layer of batting for padding on the arms and down the side.
- Slip the fabric in the crack between the sides and the back. Batting will only be on the sides and top of the arm because it won’t fit through the crack.
- Make sure you have enough fabric in the front
- Hot glue the fabric to the seat
- Hot glue the front fabric to the front of the chair
- Hot glue the fabric to the bottom, pulling the fabric tight
Step C: Attach the 4.5″ x 9″ piece of fabric to the back of the chair. Place a thin layer of batting for padding on the inside of the back, over the top, and if you like, the back of the chair.
- Just as you did on the sides, slide the fabric between the back and the sides on both sides. Batting will only be on the front and back of the chair because it won’t fit through the crack.
- Pull the fabric down and hot glue about 1/4″ of it to the seat.
- Pull the fabric you just slide between the sides and back, and hot glue it to the back of the chair.
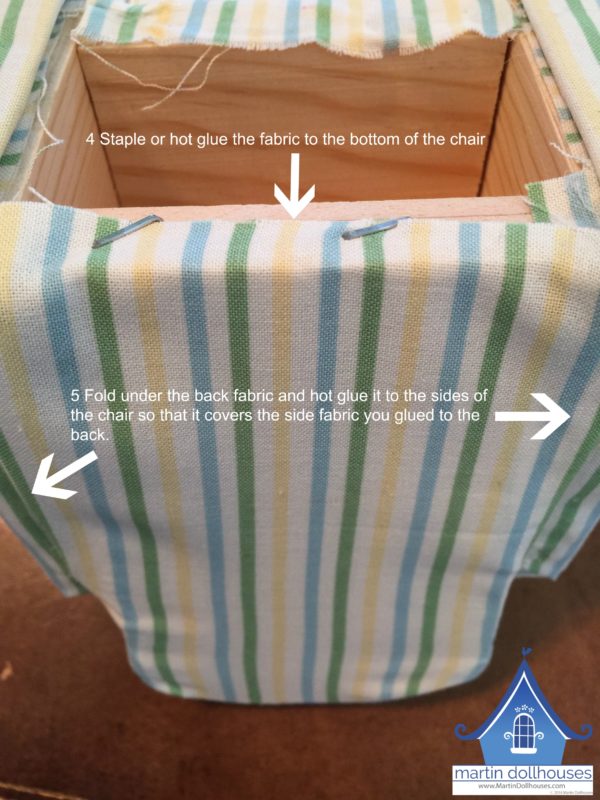
- Hot glue or staple the fabric to the bottom of the chair.
- Fold under the back fabric and hot glue it to the sides of the chair so that it covers the side fabric you glued to the back.

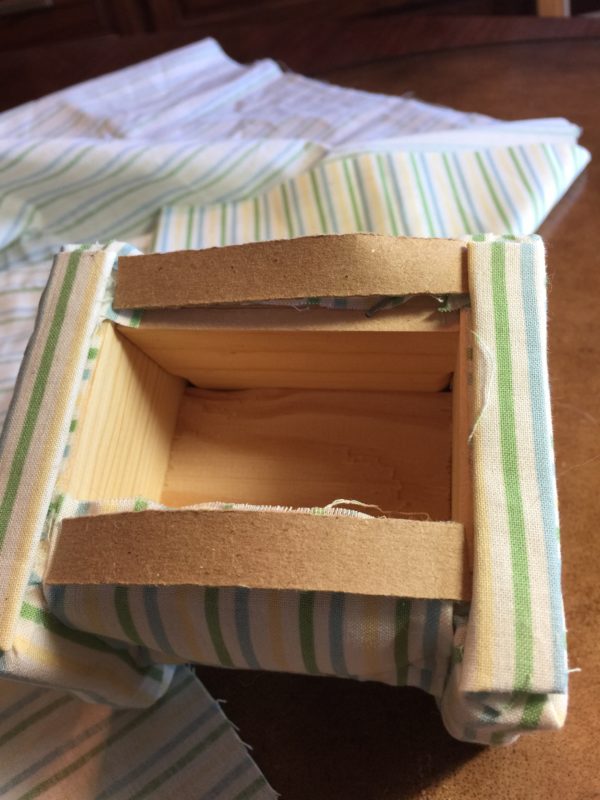
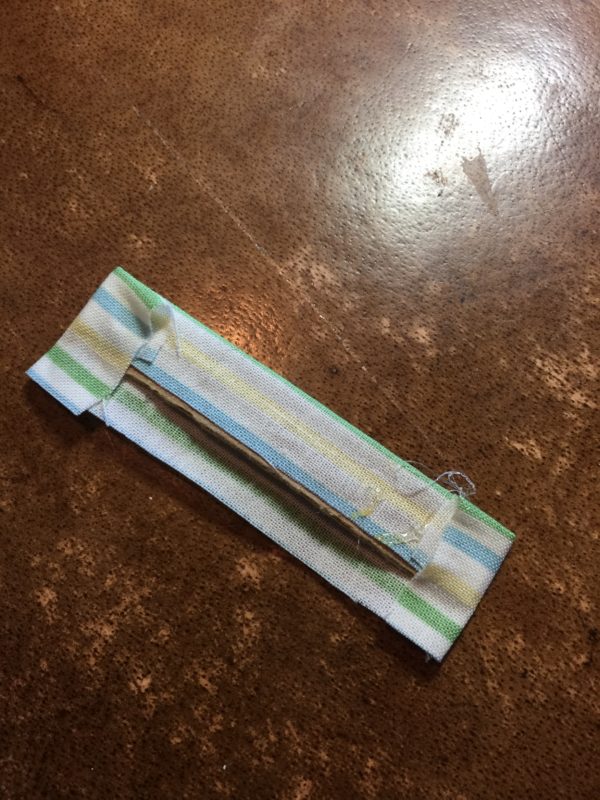
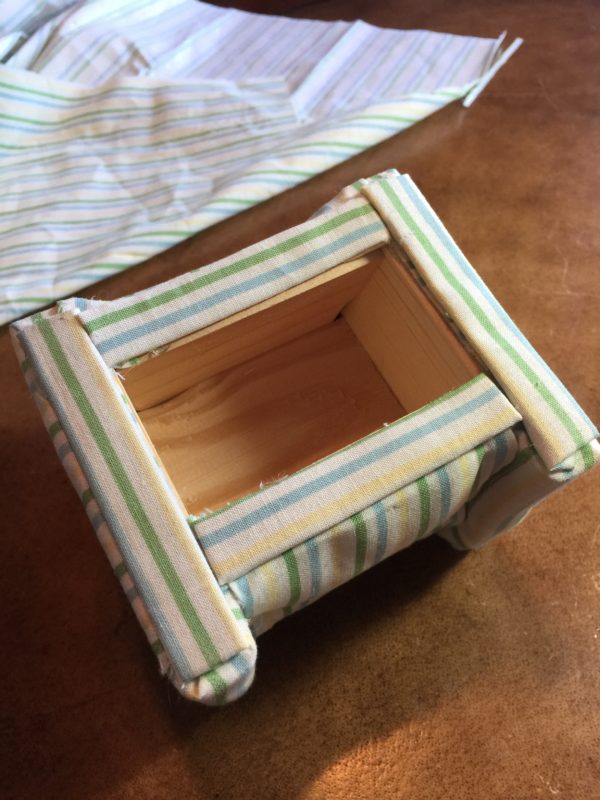
Step D: Providing A Finished Look
To give the chair a finished look, I take my Cardboard Tact, wrap it with fabric, and adhere it to the bottom so the staples and rough fabric edges don’t show.
Covering the sofa is the exact same process except for a change in the width of some of the pieces. I’ll do a separate post when I cover my next sofa.